Sample GIT : https://github.com/007muditha/contextAPI.git
Being a QA engineer I was always curious about the mindset of a UI/Backend engineer. Therefor I started developing my personal projects and I selected NODE stack for my secret developer journey
When I was working with FE ( React ) development. State management, passing the state both ways was a huge issue for me. It takes a time to think of a solution and it takes more time to figure out my own code when a change is required.
That’s when I found out about the Redux. If I’m correct, Redux is all about managing your state in a separate place where all the components can update/access without worrying about the parent > child component data flow.
Although I was so ready to give a big HUG to redux, it looks a bit more complicated and understanding the concepts and frameworks like Saga had a lot of experiments and reading to do. That’s when I heard about Context API !!
In my words, Context API does something similar to Redux and it allows you to manager your state outside your component, allowing it accessible to all the other components ( kind of :D )
I’m just going to add the details using context API mainly to help me understand the concept deeply and to help anyone who needs to get your project started with that.
Let’s Start !!
To begin with, you need to setup your basic react project. ( Let’s go with a react TS project to make it interesting )
npx create-react-app my-app --template typescriptThe folder structure will look like bellow and I have added two new folders components and context

Cool, now let’s create two components and the idea is to update a state variable from one component and access the state of a variable from the second component via context API. ( Note : we are not planning to pass the state down as props )
Component 1

Component 2

This is how our app looks at the moment

That was easy, isn’t it ?
Now let’s get back to business. Let’s say we are going to gather some user inputs and we wanted to update a ‘userData’ state variable when the user decides to submit a response ( in the input box )
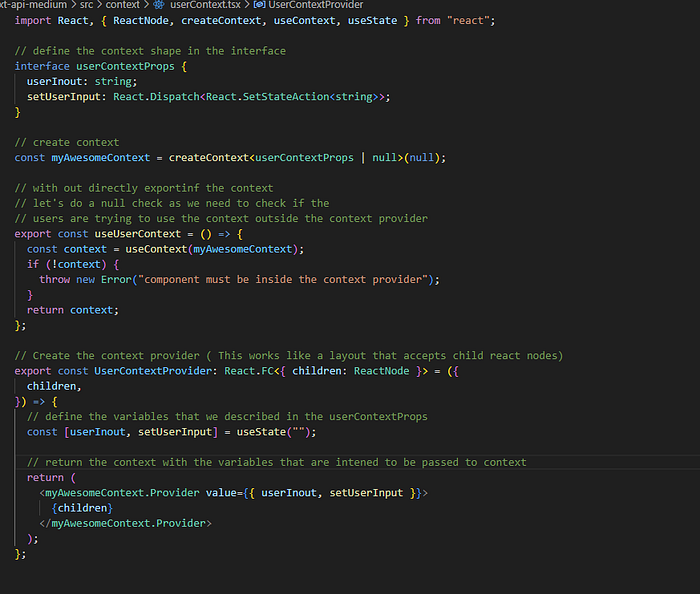
Typically we would define our state in the App component and pass the update function and the state variable as props. But we are not going to do it. Instead let’s create another file called userContext.tsx in our context folder
Before we start, let’s try to understand 3 main keywords that you will hear often.
1 createContext
createContext is a function that is provided by React to initialize context. I mean this is the function we user to create a context :D ( Pretty clear right ? ) the usage will look like this
const myAwesomecontext = React.createContext(defaultValue)

// in type script it's a bit different.
// We will use an interface to let the function know
// how our context value is going to look like

// example code  :

interface awesomeUserContextProps{
  // state variable
  userInput:string
  // update function for the state variable
  setUserInout:React.Dispatch<React.SetStateAction<string>>;
}
// create context with the default value null
const MyAwesomeUserContext = React.createContext(awesomeUserContextProps |null>(null)
2 Context provider
Context provider is a component that enables us to use the context values inside all the child components where the context provider has consumed.
For example
// inside the index.tsx file

<AwesomeContextProvider>
  <App/>
</AwesomeContextProvider>

// this means the values that can be accessed by the AwesomeContextProvider
// can be accessed by the App component and any child component inside the
// App component
3 useContext
useContext is a React Hook that allows you to use/ tap in to any value that’s provided by the context provider that allows use to subscribe to any context value that’s provided by the context provider.
Yah, I know it might look a bit complicated at first. But when you started working on it, this will be a real gem with a simple concept.
Alright, let’s try to bring all of those things together
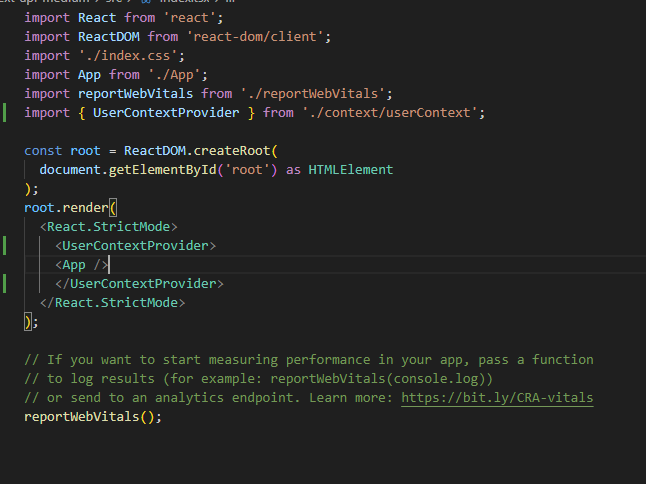
Now all we need to do is wrap our App component with the context provider
Once that’s done, the index.tsx will look like this
Now let’s try to use the context in our component 1 and component 2
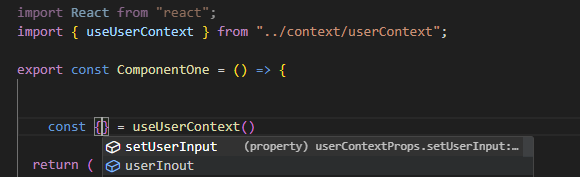
Check it out !! — now our state and state update function is available to use.
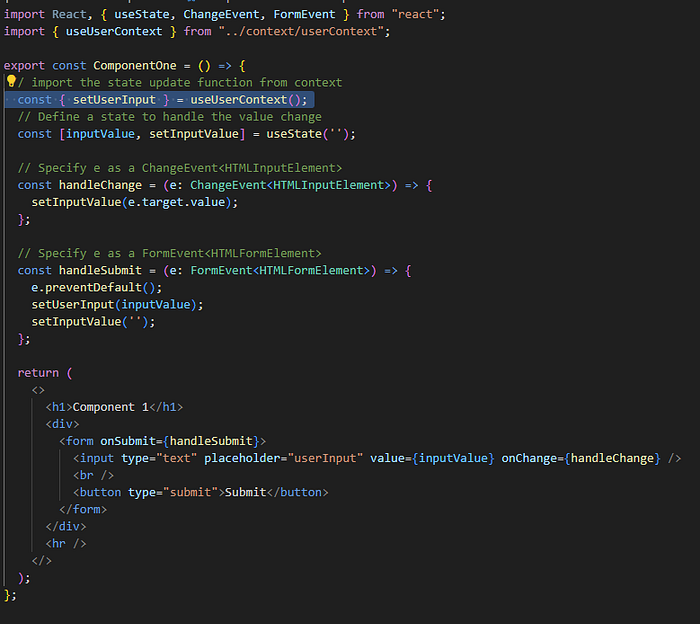
This my component 1 looks like after using the context to access the state update function
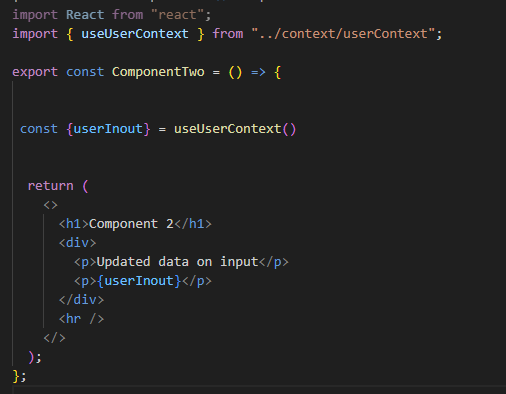
This is my component 2 — using the updated state !! Hope you can spot that we are not passing any props !!
And this is the context at work !!
Sample Git project : https://github.com/007muditha/contextAPI.git